Tutorial Social Network

Informasi Seputar Media Sosial

Tutorial Computer

Informasi Seputar Komputer

Tutorial Youtube

Informasi Seputar Youtube

Tutorial Blogger

Informasi Seputar Blogger

Tutorial Wordpress

Informasi Seputar Wordpress

Tutorial Website

Informasi Seputar Pemrograman Website

Tutorial Windows

Informasi Seputar Sistem Operasi Windows

Tutorial Linux

Informasi Seputar Sistem Operasi Linux

Tutorial Android

Informasi Seputar Android

Thursday 19 November 2020

Cara Efektif Share Portfolio Shutterstock

Cara promosi yang benner dan efektif ala Shutterstock yang fasilitasnya sudah disediakan di Dashboard akun masing-masing, namanya Widget Portofolio.

1. Pertama-tama silahkan teman-teman masuk ke sub-menu Gallery di menu Promotion.Atau bisa juga langsung masuk ke alamat url ini http://www.promote.shutterstock.com

Posisi Sub Menu Gallery

2. Nah, kemudian teman-teman menemukan halaman baru seperti gambar dibawah. Silahkan teman-teman klik tombol create Gallery untuk membuat Widget Portofolio yang nantinya akan kita share.


3. Kemudian silahkan Sign in dengan user dan pasword akun Contributor teman-teman sekalian seperti saat sign dengan akun kontributor biasa.

4. Jika sudah sign in, maka teman-teman akan masuk ke tampilan pengaturan Widget seperti dibawah. Pada bagian ini teman-teman bisa mengcustomize widget Portofolio yang teman-teman mau share dengan cara melengkapi bagian-bagian yang bisa diisi seperti. Size, Content Type, From, Themes dan Name. Untuk isian di tiap bagian ini cukup teman-teman sesuaikan dengan keiniginan teman-teman. Jika Sudah maka silahkan klik Tombol Save Galery.


5. Jika sudah tersave, maka teman-teman- bisa mengshare atau mempromosikan portofolio teman-teman melalui social media yang tombolnya sudah disediakan. Cukup klik salah satu icon, maka teman-teman akan diarahkan langsung ke akun social media teman-teman. Maka silahkan share. Selain social media, maka widget Portofolio ini bisa juga di share via website dengan cara mengkopy kode HTML yang berada pada bagian bawah icon social media.

Contoh widget yang saya share Via Pinterest

6. Jika, teman-teman sudah share atau promosikan, maka widget portofolio ini bisa dilihat atau ditracking, sampai sejauh mana orang melihat widget yang telah kita share dengan cara masuk ke bagian tombol see all Widget. Seperti gambar dibawah.

Bagian Widget manager dimana teman-teman bisa melihat pencapaian widget yang dipromosikan

7. Pada bagian diatasini teman-teman bisa melihat berapa jumlah klik, shared dan bahkan Koment Facebook yang diberikan orang terhadap widget yang telah kita share.

8. Jika ingin memperomosikan portofolio lainnya maka silahkan buat widget baru dengan klik create widget. Kemudian buatlah widget baru sesuai dengan cara yang telah saya jelaskan diatas.

9. Jika penjelasan saya diatas masih kurang jelas maka silahkan tonton tata cara share Widget portofolio di viideo berikut ini.

Melakukan share atau promosi portofolio SHutterstock kita dengan Widget Porotofolio. Cara promosi seperti ini setidaknya membuat kita bisa melihat sudah sejauh mana jangkauan promosi kita. Bisa jadi dengan semakin banyak orang mengshare widget kita maka semakin banyak buyer yang yang mendownload karya kita sehingga earning kita menjadi semakin meningkat. So, terkahir saya ingin mengatakan Jangan Takut Share Portofolio kita. Jika ada yang meniru maka cukup laporkan saja ke pihak Shutterstock.

7 Tips Membuat Proposal Usaha yang Baik dan Benar

Saat menulis sebuah buku, seorang penulis harus menentukan siapa pembacanya nanti, menjelaskan tentang buku itu, mengapa buku itu akan lebih baik dari pada yang lain, dan mengapa penerbit akan menerbitkannya.

Demikian pula sebuah proposal usaha, Anda harus tahu siapa yang akan menjadi target pasar, mampu menjelaskan bisnis, mengapa lebih unggul dari pesaing di industri yang sama, dan mengapa investor tertarik untuk menyimpan uang pada Anda. Kurang lebih hampir sama juga dengan membuat business plan.

1. Tulis secara jelas dan singkat
Pada saat menulis dalam proposal mengenai bisnis yang Anda jalankan, biasanya Anda akan memiliki kecenderungan untuk menunjukkan keahlian Anda dalam berbahasa dengan menggunakan jargon yang kurang umum. Anda harus menghindari hal tersebut dengan membuatnya menjadi lebih singkat dan straight to the point. Tentukan hal apa saja yang ingin dibahas dan jelaskan dalam bahasa yang baik. Ingat, ketika orang membaca proposal, mereka mungkin hanya tahu sedikit atau bahkan tidak tahu tentang apa yang sedang Anda ajukan. Dengan kondisi seperti itu, Anda harus bisa membuat mereka untuk membaca secara detail keseluruhannya. Mulailah dari bagian awal yang jelas, sederhana, dan logis. Bagi ke dalam beberapa poin penting sehingga proposal usaha Anda mudah dimengerti banyak orang.

2. Buat argumen yang baik dan kendala yang mungkin muncul
Pada dasarnya, sebuah proposal usaha yang baik adalah seperti sebuah brosur bisnis yang menyamar. Di dalamnya, Anda menjelaskan mengenai bisnis Anda, menjelaskan berbagai langkah terbaik untuk memajukan bisnis Anda, dan membuat diri Anda menarik bagi pembaca. Bagaimana melakukannya? Cara terbaik adalah dengan mengumpulkan berbagai fakta terbaik dan argumen yang mendukung. Buat tema bisnis Anda menjadi lebih kuat dengan penjelasan yang baik sehingga pembaca menyusuri setiap halaman dan terarah pada satu kesimpulan yang masuk akal bagi mereka. Jangan lupa untuk menempatkan diri pada posisi pembaca. Pikirkan apa saja argumen yang mungkin muncul dan apa saja hal yang mungkin bersebrangan dengan pendapat Anda. Dengan memperkirakan itu semua, Anda bisa menjadi lebih siap dalam mempresentasikan proposal Anda dan bisa lebih dipercaya.

3. Tunjukkan kepribadian Anda
Seringkali kita melihat seolah-olah yang menulis proposal usaha adalah robot pekerja yang sudah diprogram sehingga nampak begitu membosankan, bahkan seringkali menyesatkan. Dalam menuyusun proposal, biarkanlah kepribadian Anda ikut menulis. Biarkan pembaca melihat siapa Anda sebenarnya. Tularkan atusiasme Anda pada proposal usaha Anda sehingga pembaca bisa semakin yakin dengan proposal usaha yang Anda buat.

4. Gunakan gambar secara cerdas
Penggunaan gambar pada proposal memang sangat dibutuhkan agar proposal tidak terlihat membosankan. Namun, jangan sampai Anda salah menggunakan gambar atau menggunakan gambar yang berlebihan. Penggunaan gambar memang mampu membantu Anda untuk menyampaikan ide, ‘menghidupkan’ proposal usaha Anda dan memungkinkan pembaca untuk lebih tertarik dengan proposal Anda. Pastikan saja gambar-gambar yang Anda gunakan bisa membantu Anda dalam menjelaskan ide Anda, bukan mengganggu pembaca.

5. Jangan terlalu menjual
Hindari penggunaan kalimat hiperbola. Penggunaan kalimat hiperbola bisa membuat proposal Anda menjadi sulit dimengerti dan membuat hilangnya kredibilitas. Setelah pembaca berpikir Anda tidak tepat membidik mereka, mereka mungkin mempertanyakan kebeneran dari segala sesuatu dalam proposal itu, dan apa tujuannya.

6. Hindari copy paste dan kesalahan pengetikan
Dalam membuat proposal usaha, Anda tidak bisa mengcopy dan paste bagian dari proposal usaha milik orang lain. Anda bisa menggunakan proposal milik orang lain sebagai referensi dan memperhatikan bagian-bagian yang Anda sukai dari proposal tersebut. Sehingga Anda bisa mencoba berbagai penempatan dan penggunaan frase yang dianggap persuasif yang nantinya akan berhasil menarik perhatian pembaca. Proposal yang baik tentunya tidak memiliki kesalahan dalam setiap pengetikannya dan tentunya memuat banyak fakta dan data. Penggunaan data dan fakta yang valid mampu membuat pembaca dapat menjadi yakin dengan apa yang Anda tuliskan.

7. Selalu jaga agar pembaca tetap sadar
Sebuah proposal adalah salah satu dari alat pemasaran, dan dengan demikian jangan biarkan proposal usaha kehilangan fokus utamanya. Jika Anda berhasil membuat pembaca terpukau dengan tulisan, gambar yang digunakan dan segala argumen yang Anda sampaikan, pembaca mungkin akan mulai masuk dengan tahap diskusi perihal harga.

Jika Anda telah berhasil menyelesaikan proposal usaha dengan baik, Anda dapat melampirkannya pada website bisnis. Dengan begitu proposal tersebut dapat menjangkau pembaca yang lebih luas, dan anda tidak perlu repot pergi ke berbagai daerah yang jauh hanya untuk memberikan proposal itu.

20 Tips dan Trik Memaksimalkan Penggunaan Tumblr

Tumblr adalah platform mikroblog dan social networking yang dimiliki dan dioperasikan Tumblr, Inc. Layanan ini memungkinkan pengguna men-upload konten multimedia atau lainnya dalam bentuk blog pendek. Pengguna dapat mengikuti blog pengguna lain atau mengatur privasi blog sendiri.

Hindari reblogging tulisan yang terlalu panjang dalam bentuk link


Tumblr diprogram untuk me-Reblog postingan yang panjang sebagai link. Tetapi beberapa follower Anda mungkin ingin membaca seluruh postingan di dashboard tanpa mengarah ke halaman lain. Solusinya sederhana : hanya dengan me-Reblog postingan sebagai Teks, bukan link. Menu drop-down memberikan Anda pilihan untuk mengubah format dari postingan. Pilih Reblog sebagai teks untuk me-Reblog seluruh isi postingan dengan lengkap.

Gunakan keyboard shortcuts pada dashboard
Ada cara yang efisien melalui dashboard Anda, yang akan menghemat waktu dan usaha. Berikut adalah cara pintas yang dapat Anda gunakan untuk browsing di dashboard Anda.
Shortcut Action
J Scroll forward
K Scroll backward
L Like the current post
N See the number of notes
Shift + E Add post to your queue
Shift + R Fast reblog
Z + Tab Quickly switch between dashboard and blog
Z + C Quickly compose a post
Space View photoset in a lightbox or start playing a video post

Memungkinkan pengguna untuk membalas postingan Anda dari dashboard
Terkadang Anda mungkin menginginkan follower Anda untuk membalas postingan Anda. Untuk melakukannya, Add a di akhir posting Anda dan pilihan Let People Answer This yang akan muncul di bagian bawah (lihat screenshot). Aktifkan opsi dengan mencentang kotak dan follower Anda akan dapat membalas postingan Anda.


Customize follow & share buttons
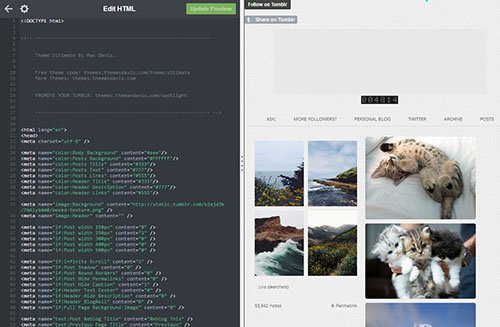
Permudah lah pembaca Anda untuk berbagi konten Tumblr Anda dengan menambahkan tombol Share. Menujulah ke Buttons untuk melihat pilihan guna menyesuaikan tombol Follow and Share. Setelah Anda memilih desain, maka kode akan ditampilkan. Sekarang, buka Tumblr pada tab baru dan silakan menuju ke Settings dan klik Customize Theme. Anda akan diarahkan ke halaman yang memungkinkan Anda untuk edit HTML. Salin kode untuk Follow and Share Buttons dan paste di kode Tema Tumblr Anda.


Ajukan pertanyaan untuk pengguna lain dari dashboard
Sebelumnya pada Tumblr, untuk meminta pertanyaan dari para pengguna, Anda harus menuju ke blog mereka untuk melakukannya. Sekarang Anda dapat melakukannya dari dashboard hanya dengan mengarahkan kursor mouse ke icon pengguna. Klik pada sosok abu-abu dan Anda akan melihat 3 pilihan – Ajukan pertanyaan, Kirim surat penggemar, lalu Abaikan. Pilih “Ask a question” dan text box akan muncul bagi Anda untuk mempermudah dalam melakukan hal itu.


Mengembalikan themes lama Anda
Cukup klik pada link ini untuk kembali ke salah satu tema yang telah digunakan di masa lalu. Klik Revert dan tema blog Anda akan kembali seperti semula. Anda mungkin harus menghabiskan waktu bermain-main untuk mendapatkan yang tepat.


Edit massal posts dan tags
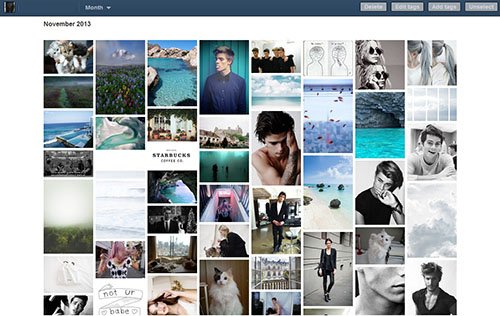
Dengan memberikan pilihan untuk Mass Edit Posts, Tumblr telah mempermudah penggunanya untuk menambahkan tag tertentu untuk semua postingan mereka. Ketika Anda berada di dashboard Anda, lihatlah ke sisi kanan halaman dan klik pada Posts. Di bawah Customize, link yang mengatakan Mass Post Editor akan muncul. Klik link tersebut dan Anda dapat mengedit / menambahkan tag dan menghapus semua postingan sekaligus.


Queue postingan Anda
Tumblr memungkinkan Anda untuk menjadwalkan postingan Anda selama beberapa jam atau beberapa hari. Ini adalah cara mudah untuk menjaga blog Anda tetap aktif dan konsisten. Di bawah Settings, Anda dapat mengedit jumlah posting yang ingin diterbitkan dari Queue sebaik pengaturan waktu.


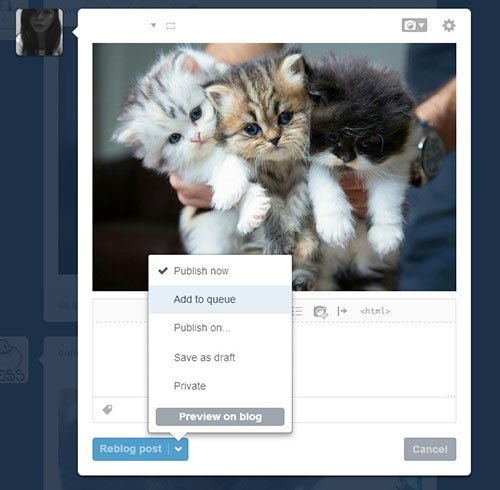
Bila Anda ingin menambahkan postingan ke Queue Anda, klik tanda panah di sebelah Reblog Post. Sebuah menu drop-down akan memberikan Anda pilihan untuk Add To Queue. Postingan ini akan disimpan ke daftar Queue Anda dan akan diterbitkan kemudian.


Menunda balasan Anda pada setiap pertanyaan
Mungkin akan tiba waktunya ketika follower Anda akan membombardir Askbox Anda dan Anda akan membalas mereka satu per satu. Akibatnya, alih-alih memiliki warna-warni postingan di blog Anda, akan memiliki satu ton kotak abu-abu dengan balasan Anda. Jadi, apa yang dapat Anda lakukan? Anda dapat menghentikan balasan dari kegiatan memposting satu demi satu dengan menundanya. Ketika Anda menjawab pertanyaan, cukup tekan dan tahan tombol Alt untuk option: Queue atau Save As Draft, lalu pilih Queue untuk balasan Anda yang akan diterbitkan di lain waktu.


Bermain-main dengan logo Tumblr
Pernahkah Anda ingin menggunakan logo Tumblr pada gambar, kolase atau sebagai icon Anda, tetapi mencari logo Tumblr di Google sepertinya tidak pernah memberikan ukuran dan warna yang sesuai? Tumblr menyediakan logo yang cukup para penggunanya dengan logonya. Klik di sini untuk melihat desain yang berbeda. Sekarang Anda dapat men-download logo dan menggunakannya pada gambar, sebagai bagian dari tema Tumblr Anda, sebagai ikon Tumblr Anda, dll


Bonus: 10 ekstensi Tumblr yang harus dimiliki


Tweak dashboard Anda, sidebar, cara pintas, mass editor, dll dengan add-on untuk Chrome, Firefox dan Safari ini.

Sebuah paket ekstensi yang mencakup berbagai add-ons yang dapat dengan mudah ditambahkan dan dihapus dari blog Anda. Ini tersedia untuk Chrome, Safari, Opera dan Firefox.


Menambahkan view count


Penasaran ingin tahu berapa banyak trraffic blog Anda? Lacak lah jumlah orang yang mengunjungi blog Anda dengan menggunakan TotallyLayouts. Pilih “Tumblr” option dan klik Create counter untuk mendapatkan kode.

Menambahkan Musik Player


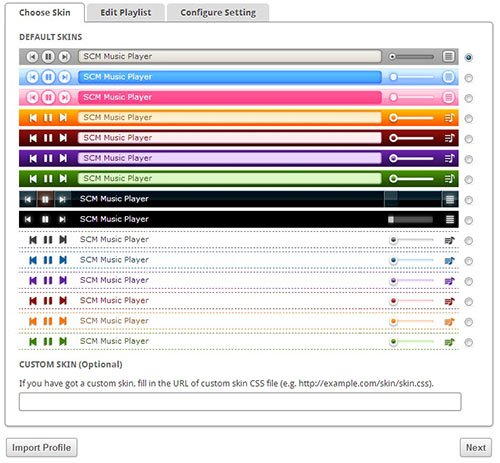
Tambahkan pemutar musik dari SCM Music Player untuk membuat blog Anda lebih hidup dan menarik. Pilih skin dan melanjutkan ke Edit Playlist. Anda dapat menambahkan lagu dalam 3 format: link MP3, trek SoundCloud dan alamat YouTube.

Dapatkan sebuah tema dashboard
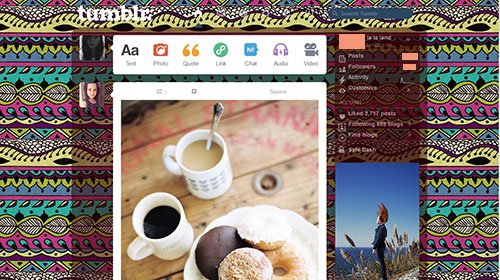
Bosan dengan default dashboard biru pada tema Anda? Download ekstensi Gaya untuk Chrome atau Firefox dan kemudian kunjungi user styles untuk melihat tema yang tersedia.


Scrolling tanpa akhir
Dengan ini, maka akan lebih mudah untuk menelusuri blog dan tidak perlu menekan Next Page setelah setiap 10 tulisan atau lebih! Ada cara untuk otomatis scrolling non-stop pada blog Anda. Kunjungi Customize My Tumblr untuk mendapatkan kodenya.


Tambahkan Twitter follow badge pada blog Anda
Kunjungi Go2Web20 untuk menghubungkan account Twitter Anda ke blog Tumblr Anda.


Berbagi konten via Bookmarklet
Terkadang Anda mungkin menemukan sesuatu yang telah Anda temukan di tempat lain, bahwa Anda ingin berbagi pada Tumblr, tetapi tidak yakin bagaimana cara melakukannya. Cukup klik pada Apps (kanan bawah dashboard Anda). Kemudian, klik dan tarik Share on Tumblr oval ke bar bookmark Anda. Sekarang setiap kali Anda ingin berbagi konten pada Tumblr, Anda bisa klik pada Share di Tumblr (yang dapat ditemukan di bar bookmark Anda), dan posting akan ditampilkan. Klik Publish dan posting akan dipublikasikan di blog Anda.


Sesuaikan kursor mouse Anda
Mengapa harus menuju ke kursor mouse default ketika itu bisa menjadi item apapun yang Anda inginkan! Browse kursor mouse di TotallyLayouts dan pilihlah desainnya.


Sesuaikan scroll bar Anda
Membuat blog Anda lebih menarik follower Anda dengan menyesuaikan scroll bar blog Anda di TotallyLayouts.


Tumblr sama dengan blog dan WordPress yang memiliki kelebihan diantaranya :
Simple dan mudah digunakan,
Mudah mencari teman dengan cara mem “follow” pengguna lain
Bisa Reblog (tidak perlu copy paste untuk mem-publish postingan orang lain
Banyak pilihan theme/template

Wednesday 18 November 2020

Control HTML5 Audio With Jquery

Well, we can control almost every feature that default HTML5 player provides like play/pause/volume up/down, mute on/off etc and additional functionality like stop,forward/backward capability etc.
So, if you have N number of audio files on a single page, and instead of letting user dealing with N audio players, you can give it an efficient interface and control what to play/stop etc with jQuery.


The Audio Media:
Lets use the following code as our HTML5 code for the audio media:

<audio class="audioDemo" controls preload="none"> 
<source src="audio/pitbull.mp3" type="audio/mpeg">
<source src="audio/music.ogg" type="audio/ogg">
</audio>

We have kept two media, because of compatibility issue on browsers, so that alternative one being loaded.

Loading The Audio With jQuery:
as you can see on the above HTML5 code, we have set the “preload” option to “none”, which means, no information about the audio file will be loaded on page load, neither the audio file nor any metadata. We will do them by ourselves from jQuery to boost the page load performance. Lets use the following code to load the audio:

$(".audioDemo").trigger('load');

We can also add event listener to know when its loaded. However, the event will be triggered immediate after the metadata loaded and audio starts loading. But it won’t wait till the audio loads in full, which usually loads on demand. To do something after the loading, use the following code before triggering the load event:

$(".audioDemo").bind("load",function(){
$(".alert-success").html("Audio Loaded succesfully");
});

Play/Pause/Stop Audio:
Start playing audio and to pause it is fairly easy to handle, just need to trigger corresponding events as below:

//starts playing
$(".audioDemo").trigger('play');
//pause playing
$(".audioDemo").trigger('pause');

However, there is not ready event to stop an audio, so we will need to do it with help of ‘pause’ event and another property named “currentTime”, which indicates the current playing time. Here is what will do to stop:

function stopAudio(){
//pause playing
$(".audioDemo").trigger('pause');
//set play time to 0
$(".audioDemo").prop("currentTime",0);
}

Forward/Backward Capability:
Default HTML5 player doesn’t provide these facility, but we can easily make such functionality with a little jQuery code. Here is a small example code to do so:

//forward the music about 5 seconds
$(".audioDemo").prop("currentTime",$(".audioDemo").prop("currentTime")+5);
//backward the music about 5 seconds
$(".audioDemo").prop("currentTime",$(".audioDemo").prop("currentTime")-5);

Volume Up/Down:
Audio player has its own “volume” properly which can be controlled with jQuery as below:

function volumeUp(){
var volume = $(".audioDemo").prop("volume")+0.2;
if(volume >1){
volume = 1;
}
$(".audioDemo").prop("volume",volume);
}

function volumeDown(){
var volume = $(".audioDemo").prop("volume")-0.2;
if(volume <0){
volume = 0;
}
$(".audioDemo").prop("volume",volume);
}

We need to keep checking whether volume reaches its largest or minimum value, otherwise JavaScript exception error will be thrown.

Mute On/Off:
We can instantly make an audio off and turn on to its earlier volume level easily with use of “muted” property. See the example code below, which actually toggle current mute state:

function toggleMuteAudio(){
$(".audioDemo").prop("muted",!$(".audioDemo").prop("muted"));
}

Final Words:
Hope this small tutorial on controlling HTML5 audio with jQuery will help you develop audio/music driven web application easily.

Create Music Playlist with HTML5 and JavaScript

Learn how to leverage the power of HTML5 audio and video tags
There are many JavaScript libraries for showing videos and playing music contents on a website. However, with advent of HTML5 and its audio and video elements, developers now can easily add video and audio players to their sites without using a third-party JavaScript library. In this tutorial, we review main attributes of audio tag and show you how to create a music playlist by adding some JavaScript codes to it.

Project Background
As a web designer or freelancer, you may run into cases where you need to integrate few audio or video files to a web page. For instance, you are building a website for a nightclub and they ask you to add a music track in the background or a book author wants to add a teaser video on its website. Other cases are where you just need to list few audio or video files on a web page. In all the mentioned scenarios, you can just use simple HTML5 for adding audio or video files to a page. Also, there are two issues with most of JS audio player libraries:
They usually come with many features or options that may not be used in your project; yet, you need to download and use all of library files. It may add additional loads on your server and website.
The JS libraries sometime clash with other JS frameworks or cease functioning when you update your JS framework or CMS plug-in. For example, you may install new version of jQuery not knowing that your audio JS library does not support it. In short, considering shortcoming of third-party JS libraries and easy of using HTML5, it is strongly recommended to use HTML5 audio tags wherever needed.

In this short tutorial, we will show you how to use the HTML5 <audio /> element and expand it to a basic music playlist by means of basic JavaScript.

It is good to know that although in this tutorial, we focus on HTML5 audio tag, all of the topics covered in this tutorial can be applied to HTML5 video tag too. That means, you can create a simple YouTube channel by following this recipe and replacing <audio> with <video> tag.

Project Prerequisites
To follow and finish this tutorial, basic knowledge of HTML5, CSS and JavaScript is required.
Project Files

Click here to download the project source files. You can see its live demo too.
HTML5 Audio Tag Overview

Below is a simple syntax for adding audio in a webpage.
Hide Copy Code<audio src="./files/audio.ogg"> </audio>

You can check the W3School site to explore basic audio tag elements such as media source, media format, browser support, etc. In this tutorial, we briefly review its main attributes and continue with more advanced usage using JavaScript to do more with HTML5 audio tags.

HTML5 Audio Tag Attributes
The <audio /> Tag comes with attributes that will assist you to manage the behavior of the media on your page. Main attributes are Controls, Autoplay, Loops and Preload.

The Controls attribute comes with the following default audio control components: Play and Pause buttons, Volume control, and the track duration. You can add it to audio tag like below:
Hide Copy Code<audio controls="controls"> <source src="./files/audio.ogg"/> </audio>

Autoplay attribute makes the audio run when a page is loaded even without showing the player. You can add this attribute like below:
Hide Copy Code<audio autoplay="autoplay"> <source src="./files/audio.ogg"/> </audio>

Loop allows an audio to be played over and over. You can add this attribute like below:
Hide Copy Code<audio loop="loop"autoplay > <source src="./files/audio.ogg"/> </audio>

Preload attribute tells the browser how to treat the media file. This attribute accept the following values:
auto: The browser can download the whole file if it is needed by the user (this is the default value).
metadata: The user may not need the whole media, so the browser can only check for the metadatas (length) of the file, and
none: The browser will not download the file if the user does not need it. This can be used to minimize server load.

The below code tells the browser to not load audio file until a user clicks the Play button.
Hide Copy Code<audio preload="none"> <source src="./files/audio.ogg"/> </audio>

Audio Tag with JavaScript
As we discussed in the previous section, using HTML5 tag alone lets the browser download and play the music or audio track. However, we can accomplish more by adding JavaScript code to HTML. Here are few cases where JS comes in handy. For instance, below codes show a simple use of JS for performing play and pause actions on audio.

The HTML code is simple. The JS selects the HTML element by ID and uses audio_info global variable to listen to and manipulate the behavior of audio player. So when we run below code, a user can play and pause audio. To utilize the power of JS in audio tag manipulation, we have to explore HTML audio_info properties and methods in depth.
Hide Copy Code<audio id="audio1"> <source src="sample.mp3" /> </audio> <button id="play">Play</button><button id="stop">Stop</button>

The js code for adding Play and Pause functions are:
Hide Copy Code var audio_info = document.getElementById('audio1'); document.getElementById('play').addEventListener('click', function(){ audio_info.play(); }, false); // document.getElementById('stop').addEventListener('click', function(){ audio_info.pause(); }, false);

HTML5 Media Properties
The audio_info global variable can take the following properties:
autoplay: Act like the value of the attributes (seen in the previous section).
currentTime: Contains the current playback time, in seconds. Setting this property will set the playback time at the value defined.
duration: (Read-Only) The length, in seconds.
paused: (Read-Only) Indicates if the playback is paused or not.
volume: It gets or sets the volume of the media element : 0.0 is silent, and 1.0 is the loudest.

HTML5 Media Methods
The element also has some methods, we’ve seen play() and pause() in our previous section, here are the others:
canPlayType (mimetype): Determine if the browser can play the mimetype passed in argument. This function can return: nothing (empty string) if the browser cannot play the type, probably if the browser seems to be able to play the type, maybe if it’s impossible to tell if the type is playable or not.
fastSeek (time): This will seek directly to the given time.
load(): This method will begin loading the media from the server

When actions are made with the <audio /> tag, some events are fired, let's go over some events before using all together with our music playlist project.

HTML5 Media Events
Here is a list of events that we can use with audio element:
progress: The user agent is fetching media data.
error: An error occurs while fetching the media data.
play: Playback has begun. Fired after the play() method has returned, or when the autoplay attribute has caused playback to begin.
pause: Playback has been paused. Fired after the pause() method has returned.
loadeddata: The user agent can render the media data at the current playback position for the first time.
waiting: Playback has stopped because the next frame is not available, but the user agent expects that frame to become available shortly.
playing: Playback has started.
canplay: The user agent can resume playback of the media data, but estimates that if playback were to be started now, the media resource could not be rendered at the current playback rate up to its end without having to stop for further buffering of content.
seeking: The seeking IDL attribute changed to true and the seek operation is taking long enough that the user agent has time to fire the event.
seeked: The seeking IDL attribute changed to false.
timeupdate: The current playback position changed as part of normal playback or in an especially interesting way, for instance discontinuously. Note: This event will be fired every second.
ended: Playback has stopped because the end of the media resource was reached.
volumechange: Either the volume attribute or the muted attribute has changed. Fired after the relevant attribute’s setter has returned.

Music Player
Now that we learned how to use JS in conjunction with HTML5 audio tag, it is time to put things together and build our music player. As a reminder, the list of events that we reviewed in the previous section will come in handy while creating our music player. We divide our project into two parts. In the first part, we run HTML and JS to get information about audio elements by using few events. In the second part, we fully expand our script to build our music playlist.

Get Audio Element Info
In this part, we will show information in the browser console by using the following HTML and JS codes.
Hide Copy Code//HTML part <audio id="audio2" controls> <source src=" sample.mp3" /> </audio>

Hide Copy Code//JS part var audio_info = document.getElementById('audio2'); audio_info.addEventListener('playing', function(e){ console.log('Audio playback has started ...'); console.log('Playback started at : '+ e.target.currentTime +" seconds"); }, false); audio_info.addEventListener('pause', function(e){ console.log('Audio playback has been paused ...'); console.log('Playback paused at : '+ e.target.currentTime +" seconds"); }, false); audio_info.addEventListener('ended', function(e){ console.log('Playback has ended'); }, false); audio_info.addEventListener('volumechange', function(e){ console.log("Volume has changed ..."); console.log("Volume is now "+ e.target.volume); }, false);

In the previous JS codes, we accomplish the following: First, we get the audio element by its ID and store it in a variable: audio_info, then we add listeners on the audio element for the following events:
playing, callback will log the string: Audio playback has started and an info about the currentTime of the element, when the user click on the play button. Try to start, pause, then start again to see the currentTime info updated.
playing, this is fired when the media has been paused. When the user pauses the playback, callback will be called.
ended, this is fired when the media has ended.
volumechange, this is fired when the volume (of the element, not your computer) has changed, callback will log volume value.

For all the events we used the event target to get information about the audio element, we did not use the audio_info variable. Here, we tried an alternative solution to audio_info global variable (discussed in the previous section). So you can use either of them in your music playlist project. That means, you can make a choice between using global scope variable versus event target to get information on an audio element.

Playlist Part
Now we move on to the second part and use the <audio /> element in a real music playlist. In this part, we create a small tool that will play multiple files; it means that at the end of a file, the player will start the next audio file. We will also allow the user to stop the music, and to change the volume.

Here is the HTML code:
Hide Copy Code<div id="music_list"> <audio controls autoplay></audio> </div>

And the JavaScript code:
Hide Shrink Copy Codefunction () { // Playlist array var files = [ "sample1.mp3", "sample2.mp3", "sample3.mp3" ]; // Current index of the files array var i = 0; // Get the audio element var music_player = document.querySelector("#music_list audio"); // function for moving to next audio file function next() { // Check for last audio file in the playlist if (i === files.length - 1) { i = 0; } else { i++; } // Change the audio element source music_player.src = files[i]; } // Check if the player is selected if (music_player === null) { throw "Playlist Player does not exists ..."; } else { // Start the player music_player.src = files[i]; // Listen for the music ended event, to play the next audio file music_player.addEventListener('ended', next, false) } })();

Obviously, you can improve this JS coding by connecting the JS to a database via Ajax or Node.JS to load audio files or adding fancier CSS styling to it. Likewise, you can use jQuery selectors for selecting and manipulating HTML elements.

Conclusion
The HTML5 <audio /> offers the ability to easily embed sound into your webpage. As we discussed and reviewed its properties, methods and events, you noticed that we can accomplish more by using simple JS code along with our HTML5 audio tags. Also, if you like to use HTML5 <video> tag instead of audio, you can still follow and use topics discussed in this tutorial.

It is good to know that until you use a server-side coding language or encrypt your JS codes; all music track source files are visible to your site visitors (that means, they can download them for free). So if you like to create a simple e-commerce site for selling your albums or charge users for your music songs, you need to do additional server-side coding.