Tutorial Social Network

Informasi Seputar Media Sosial

Tutorial Computer

Informasi Seputar Komputer

Tutorial Youtube

Informasi Seputar Youtube

Tutorial Blogger

Informasi Seputar Blogger

Tutorial Wordpress

Informasi Seputar Wordpress

Tutorial Website

Informasi Seputar Pemrograman Website

Tutorial Windows

Informasi Seputar Sistem Operasi Windows

Tutorial Linux

Informasi Seputar Sistem Operasi Linux

Tutorial Android

Informasi Seputar Android

Thursday, 19 November 2020

20 Tips dan Trik Memaksimalkan Penggunaan Tumblr

Tumblr adalah platform mikroblog dan social networking yang dimiliki dan dioperasikan Tumblr, Inc. Layanan ini memungkinkan pengguna men-upload konten multimedia atau lainnya dalam bentuk blog pendek. Pengguna dapat mengikuti blog pengguna lain atau mengatur privasi blog sendiri.

Hindari reblogging tulisan yang terlalu panjang dalam bentuk link


Tumblr diprogram untuk me-Reblog postingan yang panjang sebagai link. Tetapi beberapa follower Anda mungkin ingin membaca seluruh postingan di dashboard tanpa mengarah ke halaman lain. Solusinya sederhana : hanya dengan me-Reblog postingan sebagai Teks, bukan link. Menu drop-down memberikan Anda pilihan untuk mengubah format dari postingan. Pilih Reblog sebagai teks untuk me-Reblog seluruh isi postingan dengan lengkap.

Gunakan keyboard shortcuts pada dashboard
Ada cara yang efisien melalui dashboard Anda, yang akan menghemat waktu dan usaha. Berikut adalah cara pintas yang dapat Anda gunakan untuk browsing di dashboard Anda.
Shortcut Action
J Scroll forward
K Scroll backward
L Like the current post
N See the number of notes
Shift + E Add post to your queue
Shift + R Fast reblog
Z + Tab Quickly switch between dashboard and blog
Z + C Quickly compose a post
Space View photoset in a lightbox or start playing a video post

Memungkinkan pengguna untuk membalas postingan Anda dari dashboard
Terkadang Anda mungkin menginginkan follower Anda untuk membalas postingan Anda. Untuk melakukannya, Add a di akhir posting Anda dan pilihan Let People Answer This yang akan muncul di bagian bawah (lihat screenshot). Aktifkan opsi dengan mencentang kotak dan follower Anda akan dapat membalas postingan Anda.


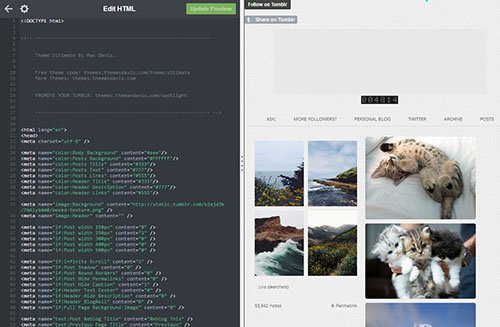
Customize follow & share buttons
Permudah lah pembaca Anda untuk berbagi konten Tumblr Anda dengan menambahkan tombol Share. Menujulah ke Buttons untuk melihat pilihan guna menyesuaikan tombol Follow and Share. Setelah Anda memilih desain, maka kode akan ditampilkan. Sekarang, buka Tumblr pada tab baru dan silakan menuju ke Settings dan klik Customize Theme. Anda akan diarahkan ke halaman yang memungkinkan Anda untuk edit HTML. Salin kode untuk Follow and Share Buttons dan paste di kode Tema Tumblr Anda.


Ajukan pertanyaan untuk pengguna lain dari dashboard
Sebelumnya pada Tumblr, untuk meminta pertanyaan dari para pengguna, Anda harus menuju ke blog mereka untuk melakukannya. Sekarang Anda dapat melakukannya dari dashboard hanya dengan mengarahkan kursor mouse ke icon pengguna. Klik pada sosok abu-abu dan Anda akan melihat 3 pilihan – Ajukan pertanyaan, Kirim surat penggemar, lalu Abaikan. Pilih “Ask a question” dan text box akan muncul bagi Anda untuk mempermudah dalam melakukan hal itu.


Mengembalikan themes lama Anda
Cukup klik pada link ini untuk kembali ke salah satu tema yang telah digunakan di masa lalu. Klik Revert dan tema blog Anda akan kembali seperti semula. Anda mungkin harus menghabiskan waktu bermain-main untuk mendapatkan yang tepat.


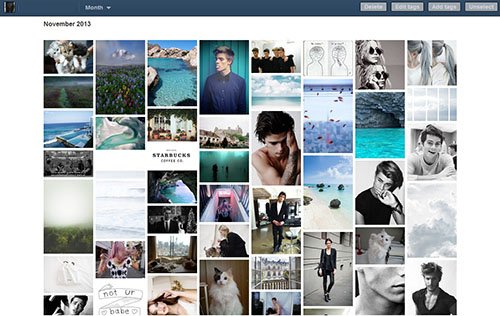
Edit massal posts dan tags
Dengan memberikan pilihan untuk Mass Edit Posts, Tumblr telah mempermudah penggunanya untuk menambahkan tag tertentu untuk semua postingan mereka. Ketika Anda berada di dashboard Anda, lihatlah ke sisi kanan halaman dan klik pada Posts. Di bawah Customize, link yang mengatakan Mass Post Editor akan muncul. Klik link tersebut dan Anda dapat mengedit / menambahkan tag dan menghapus semua postingan sekaligus.

Queue postingan Anda
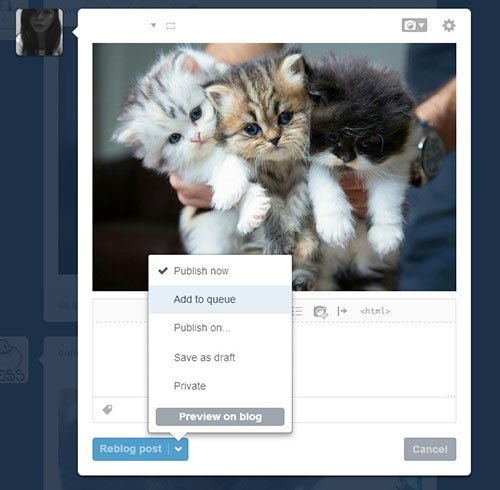
Tumblr memungkinkan Anda untuk menjadwalkan postingan Anda selama beberapa jam atau beberapa hari. Ini adalah cara mudah untuk menjaga blog Anda tetap aktif dan konsisten. Di bawah Settings, Anda dapat mengedit jumlah posting yang ingin diterbitkan dari Queue sebaik pengaturan waktu.


Bila Anda ingin menambahkan postingan ke Queue Anda, klik tanda panah di sebelah Reblog Post. Sebuah menu drop-down akan memberikan Anda pilihan untuk Add To Queue. Postingan ini akan disimpan ke daftar Queue Anda dan akan diterbitkan kemudian.

Menunda balasan Anda pada setiap pertanyaan
Mungkin akan tiba waktunya ketika follower Anda akan membombardir Askbox Anda dan Anda akan membalas mereka satu per satu. Akibatnya, alih-alih memiliki warna-warni postingan di blog Anda, akan memiliki satu ton kotak abu-abu dengan balasan Anda. Jadi, apa yang dapat Anda lakukan? Anda dapat menghentikan balasan dari kegiatan memposting satu demi satu dengan menundanya. Ketika Anda menjawab pertanyaan, cukup tekan dan tahan tombol Alt untuk option: Queue atau Save As Draft, lalu pilih Queue untuk balasan Anda yang akan diterbitkan di lain waktu.


Bermain-main dengan logo Tumblr
Pernahkah Anda ingin menggunakan logo Tumblr pada gambar, kolase atau sebagai icon Anda, tetapi mencari logo Tumblr di Google sepertinya tidak pernah memberikan ukuran dan warna yang sesuai? Tumblr menyediakan logo yang cukup para penggunanya dengan logonya. Klik di sini untuk melihat desain yang berbeda. Sekarang Anda dapat men-download logo dan menggunakannya pada gambar, sebagai bagian dari tema Tumblr Anda, sebagai ikon Tumblr Anda, dll


Bonus: 10 ekstensi Tumblr yang harus dimiliki


Tweak dashboard Anda, sidebar, cara pintas, mass editor, dll dengan add-on untuk Chrome, Firefox dan Safari ini.

Sebuah paket ekstensi yang mencakup berbagai add-ons yang dapat dengan mudah ditambahkan dan dihapus dari blog Anda. Ini tersedia untuk Chrome, Safari, Opera dan Firefox.


Menambahkan view count


Penasaran ingin tahu berapa banyak trraffic blog Anda? Lacak lah jumlah orang yang mengunjungi blog Anda dengan menggunakan TotallyLayouts. Pilih “Tumblr” option dan klik Create counter untuk mendapatkan kode.

Menambahkan Musik Player
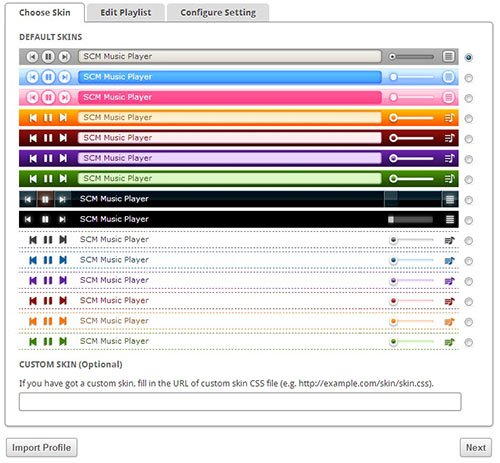

Tambahkan pemutar musik dari SCM Music Player untuk membuat blog Anda lebih hidup dan menarik. Pilih skin dan melanjutkan ke Edit Playlist. Anda dapat menambahkan lagu dalam 3 format: link MP3, trek SoundCloud dan alamat YouTube.

Dapatkan sebuah tema dashboard
Bosan dengan default dashboard biru pada tema Anda? Download ekstensi Gaya untuk Chrome atau Firefox dan kemudian kunjungi user styles untuk melihat tema yang tersedia.

Scrolling tanpa akhir
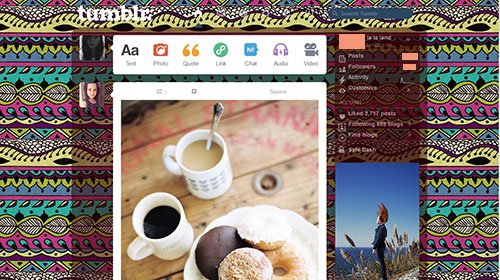
Dengan ini, maka akan lebih mudah untuk menelusuri blog dan tidak perlu menekan Next Page setelah setiap 10 tulisan atau lebih! Ada cara untuk otomatis scrolling non-stop pada blog Anda. Kunjungi Customize My Tumblr untuk mendapatkan kodenya.

Tambahkan Twitter follow badge pada blog Anda
Kunjungi Go2Web20 untuk menghubungkan account Twitter Anda ke blog Tumblr Anda.


Berbagi konten via Bookmarklet
Terkadang Anda mungkin menemukan sesuatu yang telah Anda temukan di tempat lain, bahwa Anda ingin berbagi pada Tumblr, tetapi tidak yakin bagaimana cara melakukannya. Cukup klik pada Apps (kanan bawah dashboard Anda). Kemudian, klik dan tarik Share on Tumblr oval ke bar bookmark Anda. Sekarang setiap kali Anda ingin berbagi konten pada Tumblr, Anda bisa klik pada Share di Tumblr (yang dapat ditemukan di bar bookmark Anda), dan posting akan ditampilkan. Klik Publish dan posting akan dipublikasikan di blog Anda.


Sesuaikan kursor mouse Anda
Mengapa harus menuju ke kursor mouse default ketika itu bisa menjadi item apapun yang Anda inginkan! Browse kursor mouse di TotallyLayouts dan pilihlah desainnya.


Sesuaikan scroll bar Anda
Membuat blog Anda lebih menarik follower Anda dengan menyesuaikan scroll bar blog Anda di TotallyLayouts.


Tumblr sama dengan blog dan WordPress yang memiliki kelebihan diantaranya :
Simple dan mudah digunakan,
Mudah mencari teman dengan cara mem “follow” pengguna lain
Bisa Reblog (tidak perlu copy paste untuk mem-publish postingan orang lain
Banyak pilihan theme/template

Wednesday, 18 November 2020

Control HTML5 Audio With Jquery

Well, we can control almost every feature that default HTML5 player provides like play/pause/volume up/down, mute on/off etc and additional functionality like stop,forward/backward capability etc.
So, if you have N number of audio files on a single page, and instead of letting user dealing with N audio players, you can give it an efficient interface and control what to play/stop etc with jQuery.


The Audio Media:
Lets use the following code as our HTML5 code for the audio media:

<audio class="audioDemo" controls preload="none"> 
<source src="audio/pitbull.mp3" type="audio/mpeg">
<source src="audio/music.ogg" type="audio/ogg">
</audio>

We have kept two media, because of compatibility issue on browsers, so that alternative one being loaded.

Loading The Audio With jQuery:
as you can see on the above HTML5 code, we have set the “preload” option to “none”, which means, no information about the audio file will be loaded on page load, neither the audio file nor any metadata. We will do them by ourselves from jQuery to boost the page load performance. Lets use the following code to load the audio:

$(".audioDemo").trigger('load');

We can also add event listener to know when its loaded. However, the event will be triggered immediate after the metadata loaded and audio starts loading. But it won’t wait till the audio loads in full, which usually loads on demand. To do something after the loading, use the following code before triggering the load event:

$(".audioDemo").bind("load",function(){
$(".alert-success").html("Audio Loaded succesfully");
});

Play/Pause/Stop Audio:
Start playing audio and to pause it is fairly easy to handle, just need to trigger corresponding events as below:

//starts playing
$(".audioDemo").trigger('play');
//pause playing
$(".audioDemo").trigger('pause');

However, there is not ready event to stop an audio, so we will need to do it with help of ‘pause’ event and another property named “currentTime”, which indicates the current playing time. Here is what will do to stop:

function stopAudio(){
//pause playing
$(".audioDemo").trigger('pause');
//set play time to 0
$(".audioDemo").prop("currentTime",0);
}

Forward/Backward Capability:
Default HTML5 player doesn’t provide these facility, but we can easily make such functionality with a little jQuery code. Here is a small example code to do so:

//forward the music about 5 seconds
$(".audioDemo").prop("currentTime",$(".audioDemo").prop("currentTime")+5);
//backward the music about 5 seconds
$(".audioDemo").prop("currentTime",$(".audioDemo").prop("currentTime")-5);

Volume Up/Down:
Audio player has its own “volume” properly which can be controlled with jQuery as below:

function volumeUp(){
var volume = $(".audioDemo").prop("volume")+0.2;
if(volume >1){
volume = 1;
}
$(".audioDemo").prop("volume",volume);
}

function volumeDown(){
var volume = $(".audioDemo").prop("volume")-0.2;
if(volume <0){
volume = 0;
}
$(".audioDemo").prop("volume",volume);
}

We need to keep checking whether volume reaches its largest or minimum value, otherwise JavaScript exception error will be thrown.

Mute On/Off:
We can instantly make an audio off and turn on to its earlier volume level easily with use of “muted” property. See the example code below, which actually toggle current mute state:

function toggleMuteAudio(){
$(".audioDemo").prop("muted",!$(".audioDemo").prop("muted"));
}

Final Words:
Hope this small tutorial on controlling HTML5 audio with jQuery will help you develop audio/music driven web application easily.

Create Music Playlist with HTML5 and JavaScript

Learn how to leverage the power of HTML5 audio and video tags
There are many JavaScript libraries for showing videos and playing music contents on a website. However, with advent of HTML5 and its audio and video elements, developers now can easily add video and audio players to their sites without using a third-party JavaScript library. In this tutorial, we review main attributes of audio tag and show you how to create a music playlist by adding some JavaScript codes to it.

Project Background
As a web designer or freelancer, you may run into cases where you need to integrate few audio or video files to a web page. For instance, you are building a website for a nightclub and they ask you to add a music track in the background or a book author wants to add a teaser video on its website. Other cases are where you just need to list few audio or video files on a web page. In all the mentioned scenarios, you can just use simple HTML5 for adding audio or video files to a page. Also, there are two issues with most of JS audio player libraries:
They usually come with many features or options that may not be used in your project; yet, you need to download and use all of library files. It may add additional loads on your server and website.
The JS libraries sometime clash with other JS frameworks or cease functioning when you update your JS framework or CMS plug-in. For example, you may install new version of jQuery not knowing that your audio JS library does not support it. In short, considering shortcoming of third-party JS libraries and easy of using HTML5, it is strongly recommended to use HTML5 audio tags wherever needed.

In this short tutorial, we will show you how to use the HTML5 <audio /> element and expand it to a basic music playlist by means of basic JavaScript.

It is good to know that although in this tutorial, we focus on HTML5 audio tag, all of the topics covered in this tutorial can be applied to HTML5 video tag too. That means, you can create a simple YouTube channel by following this recipe and replacing <audio> with <video> tag.

Project Prerequisites
To follow and finish this tutorial, basic knowledge of HTML5, CSS and JavaScript is required.
Project Files

Click here to download the project source files. You can see its live demo too.
HTML5 Audio Tag Overview

Below is a simple syntax for adding audio in a webpage.
Hide Copy Code<audio src="./files/audio.ogg"> </audio>

You can check the W3School site to explore basic audio tag elements such as media source, media format, browser support, etc. In this tutorial, we briefly review its main attributes and continue with more advanced usage using JavaScript to do more with HTML5 audio tags.

HTML5 Audio Tag Attributes
The <audio /> Tag comes with attributes that will assist you to manage the behavior of the media on your page. Main attributes are Controls, Autoplay, Loops and Preload.

The Controls attribute comes with the following default audio control components: Play and Pause buttons, Volume control, and the track duration. You can add it to audio tag like below:
Hide Copy Code<audio controls="controls"> <source src="./files/audio.ogg"/> </audio>

Autoplay attribute makes the audio run when a page is loaded even without showing the player. You can add this attribute like below:
Hide Copy Code<audio autoplay="autoplay"> <source src="./files/audio.ogg"/> </audio>

Loop allows an audio to be played over and over. You can add this attribute like below:
Hide Copy Code<audio loop="loop"autoplay > <source src="./files/audio.ogg"/> </audio>

Preload attribute tells the browser how to treat the media file. This attribute accept the following values:
auto: The browser can download the whole file if it is needed by the user (this is the default value).
metadata: The user may not need the whole media, so the browser can only check for the metadatas (length) of the file, and
none: The browser will not download the file if the user does not need it. This can be used to minimize server load.

The below code tells the browser to not load audio file until a user clicks the Play button.
Hide Copy Code<audio preload="none"> <source src="./files/audio.ogg"/> </audio>

Audio Tag with JavaScript
As we discussed in the previous section, using HTML5 tag alone lets the browser download and play the music or audio track. However, we can accomplish more by adding JavaScript code to HTML. Here are few cases where JS comes in handy. For instance, below codes show a simple use of JS for performing play and pause actions on audio.

The HTML code is simple. The JS selects the HTML element by ID and uses audio_info global variable to listen to and manipulate the behavior of audio player. So when we run below code, a user can play and pause audio. To utilize the power of JS in audio tag manipulation, we have to explore HTML audio_info properties and methods in depth.
Hide Copy Code<audio id="audio1"> <source src="sample.mp3" /> </audio> <button id="play">Play</button><button id="stop">Stop</button>

The js code for adding Play and Pause functions are:
Hide Copy Code var audio_info = document.getElementById('audio1'); document.getElementById('play').addEventListener('click', function(){ audio_info.play(); }, false); // document.getElementById('stop').addEventListener('click', function(){ audio_info.pause(); }, false);

HTML5 Media Properties
The audio_info global variable can take the following properties:
autoplay: Act like the value of the attributes (seen in the previous section).
currentTime: Contains the current playback time, in seconds. Setting this property will set the playback time at the value defined.
duration: (Read-Only) The length, in seconds.
paused: (Read-Only) Indicates if the playback is paused or not.
volume: It gets or sets the volume of the media element : 0.0 is silent, and 1.0 is the loudest.

HTML5 Media Methods
The element also has some methods, we’ve seen play() and pause() in our previous section, here are the others:
canPlayType (mimetype): Determine if the browser can play the mimetype passed in argument. This function can return: nothing (empty string) if the browser cannot play the type, probably if the browser seems to be able to play the type, maybe if it’s impossible to tell if the type is playable or not.
fastSeek (time): This will seek directly to the given time.
load(): This method will begin loading the media from the server

When actions are made with the <audio /> tag, some events are fired, let's go over some events before using all together with our music playlist project.

HTML5 Media Events
Here is a list of events that we can use with audio element:
progress: The user agent is fetching media data.
error: An error occurs while fetching the media data.
play: Playback has begun. Fired after the play() method has returned, or when the autoplay attribute has caused playback to begin.
pause: Playback has been paused. Fired after the pause() method has returned.
loadeddata: The user agent can render the media data at the current playback position for the first time.
waiting: Playback has stopped because the next frame is not available, but the user agent expects that frame to become available shortly.
playing: Playback has started.
canplay: The user agent can resume playback of the media data, but estimates that if playback were to be started now, the media resource could not be rendered at the current playback rate up to its end without having to stop for further buffering of content.
seeking: The seeking IDL attribute changed to true and the seek operation is taking long enough that the user agent has time to fire the event.
seeked: The seeking IDL attribute changed to false.
timeupdate: The current playback position changed as part of normal playback or in an especially interesting way, for instance discontinuously. Note: This event will be fired every second.
ended: Playback has stopped because the end of the media resource was reached.
volumechange: Either the volume attribute or the muted attribute has changed. Fired after the relevant attribute’s setter has returned.

Music Player
Now that we learned how to use JS in conjunction with HTML5 audio tag, it is time to put things together and build our music player. As a reminder, the list of events that we reviewed in the previous section will come in handy while creating our music player. We divide our project into two parts. In the first part, we run HTML and JS to get information about audio elements by using few events. In the second part, we fully expand our script to build our music playlist.

Get Audio Element Info
In this part, we will show information in the browser console by using the following HTML and JS codes.
Hide Copy Code//HTML part <audio id="audio2" controls> <source src=" sample.mp3" /> </audio>

Hide Copy Code//JS part var audio_info = document.getElementById('audio2'); audio_info.addEventListener('playing', function(e){ console.log('Audio playback has started ...'); console.log('Playback started at : '+ e.target.currentTime +" seconds"); }, false); audio_info.addEventListener('pause', function(e){ console.log('Audio playback has been paused ...'); console.log('Playback paused at : '+ e.target.currentTime +" seconds"); }, false); audio_info.addEventListener('ended', function(e){ console.log('Playback has ended'); }, false); audio_info.addEventListener('volumechange', function(e){ console.log("Volume has changed ..."); console.log("Volume is now "+ e.target.volume); }, false);

In the previous JS codes, we accomplish the following: First, we get the audio element by its ID and store it in a variable: audio_info, then we add listeners on the audio element for the following events:
playing, callback will log the string: Audio playback has started and an info about the currentTime of the element, when the user click on the play button. Try to start, pause, then start again to see the currentTime info updated.
playing, this is fired when the media has been paused. When the user pauses the playback, callback will be called.
ended, this is fired when the media has ended.
volumechange, this is fired when the volume (of the element, not your computer) has changed, callback will log volume value.

For all the events we used the event target to get information about the audio element, we did not use the audio_info variable. Here, we tried an alternative solution to audio_info global variable (discussed in the previous section). So you can use either of them in your music playlist project. That means, you can make a choice between using global scope variable versus event target to get information on an audio element.

Playlist Part
Now we move on to the second part and use the <audio /> element in a real music playlist. In this part, we create a small tool that will play multiple files; it means that at the end of a file, the player will start the next audio file. We will also allow the user to stop the music, and to change the volume.

Here is the HTML code:
Hide Copy Code<div id="music_list"> <audio controls autoplay></audio> </div>

And the JavaScript code:
Hide Shrink Copy Codefunction () { // Playlist array var files = [ "sample1.mp3", "sample2.mp3", "sample3.mp3" ]; // Current index of the files array var i = 0; // Get the audio element var music_player = document.querySelector("#music_list audio"); // function for moving to next audio file function next() { // Check for last audio file in the playlist if (i === files.length - 1) { i = 0; } else { i++; } // Change the audio element source music_player.src = files[i]; } // Check if the player is selected if (music_player === null) { throw "Playlist Player does not exists ..."; } else { // Start the player music_player.src = files[i]; // Listen for the music ended event, to play the next audio file music_player.addEventListener('ended', next, false) } })();

Obviously, you can improve this JS coding by connecting the JS to a database via Ajax or Node.JS to load audio files or adding fancier CSS styling to it. Likewise, you can use jQuery selectors for selecting and manipulating HTML elements.

Conclusion
The HTML5 <audio /> offers the ability to easily embed sound into your webpage. As we discussed and reviewed its properties, methods and events, you noticed that we can accomplish more by using simple JS code along with our HTML5 audio tags. Also, if you like to use HTML5 <video> tag instead of audio, you can still follow and use topics discussed in this tutorial.

It is good to know that until you use a server-side coding language or encrypt your JS codes; all music track source files are visible to your site visitors (that means, they can download them for free). So if you like to create a simple e-commerce site for selling your albums or charge users for your music songs, you need to do additional server-side coding.

Membuat Slider yang Elegan dan Simple di Blogspot

Slider atau yang juga sering disebut slideshow adalah informasi yang berjalan atau sliding di blog atau website. Slider pada dasarnya untuk menampilkan informasi utama yang tertuang dalam sebuah konten blog.
Karena untuk kenyamanan pengunjung, tampilan slider juga menjadi penting diperhatikan. Jika menampilkan slider dengan asal-alasan bukan tidak mungkin akan merusak estetika sebuah website. Olehnya, dibutuhkan tema slider yang sesuai dengan template yang digunakan.

Slideshow ini menggunakan JavaScript yang merupakan salah satu cara terbaik untuk menampilkan banyak informasi halaman artikel dalam ruang yang relatif kecil dengan menambahkan fungsi yang bagus.

Slider ini memiliki fitur menampilkan gambar otomatis dengan efek geser dilengkapi judul dan deskripsi / keterangan, juga memiliki navigasi menggunakan persegi / titik untuk memberikan pada pengunjung agar dapat memilih konten lebih mudah dengan melompat langsung untuk setiap slide.
Slider Geser akan berhenti secara otomatis ketika mouse hover dan ini dikonfigurasi dalam kode Script.

Slider ini dibuat dari beberapa baris HTML sederhana dan jika Anda memiliki pengetahuan dasar CSS, maka Anda dapat menyesuaikan atau memodifikasi seperti yang Anda inginkan, dan memang benar-benar dapat dimodifikasi sehingga terlihat lebih bagus.

Jika tertarik untuk membuatnya, maka ikuti langkah-langkah berikut ini:

Pertama-tama masuk ke dasboard blogspot Anda, lalu pilih Template, Edit HTML. Cari kode ]]></b:skin> atau </style> di bagian head template. Setelah ketemu (gunakan Ctrl F) copy lalu paste script berikut tepat diatasnya.
.easyslider-wrapper { 
width: auto; 
float: left; 
position: relative; 
padding-right: 2%; 
padding-top: 10px; 
}
.easyslider { 
overflow: hidden; 
position: relative; 
width: 100%; 
height: 350px; 
background: #eee; 
}
.image_reel { 
position: absolute; 
top: 0; 
left: 0; 
}
.image_reel img { 
float: left; 
width: 20%; 
height: 350px;
}
.paging { 
background: none; 
position: absolute; 
bottom: 15px; 
right: 20px; 
padding:4px 0 2px; 
z-index: 100; 
display: none; 
}
.paging a { 
margin: 3px; 
background: #fff; 
width: 10px; 
height:10px; 
display: inline-block; 
border: none; 
outline: none;
}
.paging a.active { 
background: #15E3FF; 
border: 1px solid #15E3FF; 
}
.paging a:hover { }
.easytitledes { 
width:70%; 
display: none; 
position: absolute; 
bottom: 20px; 
left: 20px; 
z-index: 101; 
background: #000A3F;
background: rgba(2, 0, 51, 0.6); 
padding: 10px 15px; 
}
.easytitledes a { 
color: #15E3FF; 
font: 14px sans-serif; 
text-transform: uppercase; 
font-weight: bold; 
}
.easytitledes a:hover { 
color:#29FF00 
}
.easytitledes p { 
color: #fff; 
font: 12px Arial; 
}

Masih disekitar head, masukan kode Jquery berikut ini tepat diatas </head>. Namun jika template Anda sudah pernah memasang Jquery dalam versi yang lain, baik itu versi lama, lupakan saja langkah ini. Langsung ke langkah selanjutnya
Masih tetap di bagian head, masukan kode JavaScript berikut diatas </head>.

<script type="text/javascript">
$(document).ready(function() {
$(".paging").show(); 
$(".paging a:first").addClass("active");

var imageWidth = $(".easyslider").width(); 
var imageSum = $(".image_reel img").size(); 
var imageReelWidth = imageWidth * imageSum;

$(".image_reel").css({'width' : imageReelWidth});

rotate = function(){ var triggerID = $active.attr("rel") - 1; 

var image_reelPosition = triggerID * imageWidth;

$(".paging a").removeClass('active');
$active.addClass('active');

$(".easytitledes").stop(true,true).slideUp('slow');
$(".easytitledes").eq( 
$('.paging a.active').attr("rel") - 1 ).slideDown("slow"); 
$(".image_reel").animate({left: -image_reelPosition}, 400 );
};

rotateSwitch = function(){
$(".easytitledes").eq( $('.paging a.active').attr("rel") - 1 ).slideDown("slow");

play = setInterval(function(){
$active = $('.paging a.active').next();

if ( $active.length === 0) {
$active = $('.paging a:first'); } rotate(); }, 4000); };

rotateSwitch(); $(".image_reel a, .easytitledes a").hover(function() {
clearInterval(play); }, function() { rotateSwitch();
});
$(".paging a").click(function() { $active = $(this);
clearInterval(play); rotate(); rotateSwitch(); return false;
});
});
</script>

Untuk memasang kode HTML slider, ada cara yang bisa ditempuh. Secara manual atau otomatis. Manual artinya, isi slider nantinya akan diisi sendiri, sedangkan secara manual, isi slider akan ikut berdasarkan postingan terbaru.

Menggunakan Slider Secara ManualMasukan kode berikut di bagian dalam HTML body blog Anda, contoh setelah atau dibawah kode <div class="main-wrapper" > atau <div id="main-wrapper" > atau baris kode yang sejenis atau mirip, karena struktur setiap Blog memiliki nama yang berbeda-beda.

Karena saya menggunakan template standar dari blogspot yang terbaru, kode itu saya tempatkan dibawah kode <div class='blog-posts hfeed'>. Itu karena saya ingin slider tersebut sejajar dengan kolom postingan. Jika Anda tertarik melakukan hal yang sama, letakkan kode berikut dibawah <div class='blog-posts hfeed'> yang pertama.

<b:if cond='data:blog.url == data:blog.homepageUrl'>
<div class='easyslider'>
<div class='image_reel'>
<a href="#"><img src="...image1.jpg" /></a>
<a href="#"><img src="...image2.jpg" /></a>
<a href="#"><img src="...image3.jpg" /></a>
<a href="#"><img src="...image4.jpg" /></a>
<a href="#"><img src="...image5.jpg" /></a>
</div>
<div class='descriptionslider'>
<div class="easytitledes"><a href='...post-link1.html'>Post-Title 1</a><p>Description / Caption 1</p></div>
<div class="easytitledes"><a href='...post-link2.html'>Post-Title 2</a><p>Description / Caption 2</p></div>
<div class="easytitledes"><a href='...post-link3.html'>Post-Title 3</a><p>Description / Caption 3</p></div>
<div class="easytitledes"><a href='...post-link4.html'>Post-Title 4</a><p>Description / Caption 4</p></div>
<div class="easytitledes"><a href='...post-link5.html'>Post-Title 5</a><p>Description / Caption 5</p></div>
</div>
<div class='paging'>
<a class='' href='#' rel='1'/>
<a class='' href='#' rel='2'/>
<a class='' href='#' rel='3'/>
<a class='' href='#' rel='4'/>
<a class='' href='#' rel='5'/>
</div>
</div>
</b:if>

Catatan: 
Kode berwarna merah adalah untuk link image atau gambar, Biru untuk link Url posting atau artikel, Wanah hijau untuk Title atau Judul, dan Orange untuk deskripsi. Semuanya dimasukan satu persatu ke dalam baris kode HTML.
Menggunakan Slider dengan Otomatis Publish Artikel TerbaruJika Anda ingin menggunakan slider tanpa harus susah-susah mengisi link dan artikelnya secara manual, maka ikuti langkah-langkah memasang slider secara otomatis berikut ini:

Pertama-tama, tambahan kode JavaScript berikut ini sebelum atau diatas kode </head> , kode inilah yang akan untuk menampilkan artikel terbaru secara otomatis.

<script type='text/javascript'>//<![CDATA[
function removeHtmlTag(strx,chop){var s = strx.split("<");for(var i=0;i<s.length;i++){if(s[i].indexOf(">")!=-1){s[i] = s[i].substring(s[i].indexOf(">")+1,s[i].length);}}s = s.join("");s = s.substring(0,chop-1);return s;}
function showrecentposts1(json) {j = (showRandomImg) ? Math.floor((imgr.length+1)*Math.random()) : 0; img = new Array(); for (var i = 0; i < numposts1; i++) {var entry = json.feed.entry[i];var posttitle = entry.title.$t; var pcm; var posturl; if (i == json.feed.entry.length) break; for (var k = 0; k < entry.link.length; k++) {if (entry.link[k].rel == 'alternate') {posturl = entry.link[k].href; break; }}
for (var k = 0; k < entry.link.length; k++) {if (entry.link[k].rel == 'replies' && entry.link[k].type == 'text/html') {pcm = entry.link[k].title.split(" ")[0]; break; }} if ("content" in entry) {var postcontent = entry.content.$t;} else if ("summary" in entry) { var postcontent = entry.summary.$t;} else var postcontent = ""; var trtd = '<div class="easytitledes"><a href="'+posturl+'">'+posttitle+'</a><p>'+removeHtmlTag(postcontent,summaryPost1)+'... </p></div>'; document.write(trtd); j++;}}
function showrecentposts2(json) { j = (showRandomImg) ? Math.floor((imgr.length+1)*Math.random()) : 0; img = new Array(); for (var i = 0; i < numposts1 ; i++) { var entry = json.feed.entry[i]; var posttitle = entry.title.$t; var pcm; var posturl; if (i == json.feed.entry.length) break; for (var k = 0; k < entry.link.length; k++) { if (entry.link[k].rel == 'alternate') { posturl = entry.link[k].href; break; }}for (var k = 0; k < entry.link.length; k++) {if (entry.link[k].rel == 'replies' && entry.link[k].type == 'text/html') { pcm = entry.link[k].title.split(" ")[0]; break; }} if ("content" in entry) {var postcontent = entry.content.$t;}; if(j>imgr.length-1) j=0; img[i] = imgr[j]; s = postcontent ; a = s.indexOf("<img"); b = s.indexOf("src=\"",a); c = s.indexOf("\"",b+5); d = s.substr(b+5,c-b-5); if((a!=-1)&&(b!=-1)&&(c!=-1)&&(d!="")) img[i] = d; var trtd = '<a href="'+posturl+'"><img src="'+img[i]+'"/></a>'; document.write(trtd); j++;}}
//]]></script>

Catatan: 
Kode warna Merah adalah link image/gambar yang tampil jika dalam suatu artikel tidak ada gambarnya, sebaiknya anda mengganti link ini dengan link image anda sendiri, supaya pemakaian tidak terbagi-bagi dengan orang lain.
Masukan kode berikut disuatu bagian dalam body template, contoh sesudah/dibawah <div class="main-wrapper" > atau yang sejenis. Seperti diatas, saya memasang kode ini dibawah kode <div class='blog-posts hfeed'> yang pertama agar slider sejajar dengan postingan.

<b:if cond='data:blog.url == data:blog.homepageUrl'>
<div class='easyslider'>
<div class='image_reel'>
<script>
document.write(&quot;&lt;script src=\&quot;/feeds/posts/default?max-results=&quot;+numposts1+&quot;&amp;orderby=published&amp;alt=json-in-script&amp;callback=showrecentposts2\&quot;&gt;&lt;\/script&gt;&quot;);
</script>
</div>
<div class='descriptionslider'>
<script> 
document.write(&quot;&lt;script src=\&quot;/feeds/posts/default?max-results=&quot;+numposts1+&quot;&amp;orderby=published&amp;alt=json-in-script&amp;callback=showrecentposts1\&quot;&gt;&lt;\/script&gt;&quot;);
</script>
</div>
<div class='paging'>
<a class='' href='#' rel='1'/>
<a class='' href='#' rel='2'/>
<a class='' href='#' rel='3'/>
<a class='' href='#' rel='4'/>
<a class='' href='#' rel='5'/>
</div>
</div>
</b:if>

Kode yang diberi warna merah adalah baris kode pembuka dan penutup untuk menampilkan slider hanya di homepage saja. Jadi slider tidak akan tampil disemua halaman blog. Hanya ketika seseorang melihat homepage atau beranda, slider ini tampil


Setelah yakin dengan hasilnya (preview terlebih dahulu) selanjutnya, Simpan Template.
Jika semua berjalan baik dan lancar maka, saat ini blog Anda sudah memiliki slider sederhana nan elegan.

Cara Membuat Orang Mengunjungi Situs Anda

Cara membuat orang mengunjungi situs Anda dan buat mereka kembali
Setelah Anda memiliki situs web, langkah Anda selanjutnya adalah menyebarkannya. Ada banyak cara untuk menarik orang ke situs Anda, tetapi membangun audiens online atau basis pelanggan lebih dari sekadar mendapatkan kunjungan satu kali — situs web yang berkembang memiliki pengikut dan pengunjung berulang. Dalam artikel ini, kita akan membahas mengapa lalu lintas situs penting dan memperkenalkan beberapa dasar tentang cara menarik pengunjung ke situs web Anda (dan membuat mereka datang kembali).

Mengapa lalu lintas situs penting
Apakah Anda sedang membangun merek atau menjual produk, keberhasilan situs web Anda bergantung pada jumlah pengunjung yang Anda dapatkan dan kualitas interaksi tersebut. Contoh nyata adalah toko online, di mana lebih banyak lalu lintas berarti lebih banyak penjualan. Namun lalu lintas juga penting jika Anda memiliki blog, di mana menjangkau lebih banyak orang dapat membantu Anda menginspirasi dan memengaruhi lebih banyak kehidupan. Selain itu, dengan lebih banyak pengunjung, Anda dapat menciptakan peluang untuk mendapatkan sponsor dan pendapatan iklan. Apa pun jenis situs yang Anda miliki, mendatangkan lebih banyak lalu lintas ke rumah online Anda adalah cara untuk tumbuh dan berkembang secara online.

Mulai dari mana
Anda dapat mengarahkan lalu lintas dan membangun pengikut online Anda melalui berbagai cara. Memilih apa yang tepat untuk Anda bergantung pada anggaran dan tujuan Anda. Berikut adalah contoh cara berbayar dan gratis untuk mempromosikan situs web Anda :

Iklan online
Pertimbangkan untuk menggunakan platform periklanan online Google untuk tampil di hadapan pelanggan yang menelusuri bisnis seperti milik Anda di Google Penelusuran dan produk Google lainnya. Dengan Google Ads, Anda hanya akan membayar untuk hasil, seperti klik ke situs atau panggilan ke bisnis Anda. Mulailah dengan Google Ads

Media sosial
Salah satu cara untuk membangun pengikut organik adalah dengan menciptakan kehadiran media sosial yang kuat. Pertimbangkan platform seperti Instagram, Facebook, dan Twitter untuk mempromosikan foto, konten, dan pembaruan yang terkait dengan merek dan situs web Anda. Pinterest sangat populer di kalangan wanita, sementara platform seperti Snapchat dapat membantu Anda menjangkau audiens yang lebih muda.

Media sosial adalah cara gratis dan efektif untuk terhubung dengan audiens Anda.
Ingat: Tujuan di media sosial adalah membuat hubungan nyata dengan audiens Anda dan membangun komunitas.
Bersikaplah autentik, buat dan posting konten yang bermanfaat, dan gunakan hashtag yang relevan. Anda juga dapat mempertimbangkan strategi seperti pemasaran influencer dan kolaborasi. Baru untuk semua ini? Lihat panduan pemula untuk media sosial ini dari Moze.

SEO
Pengoptimalan mesin telusur (SEO) mengacu pada segala hal yang dapat Anda lakukan untuk membuat situs web Anda lebih terlihat di mesin telusur seperti Google. Mayoritas lalu lintas web berasal dari orang-orang yang mengeklik beberapa hasil penelusuran gratis pertama yang muncul dalam penelusuran, jadi meluangkan waktu untuk meningkatkan SEO Anda pasti bermanfaat.

Pemasaran konten
Membuat konten bermanfaat yang diminati audiens target Anda dapat membantu Anda menarik dan melibatkan komunitas online. Misalnya, toko makanan dapat memulai blog resep, atau penasihat keuangan membuat buletin tentang menabung untuk masa pensiun. Pemasaran konten mencakup posting blog, video, buletin email, podcast, daftar, majalah, panduan cara, dan infografis.

Promosi langsung
dari mulut ke mulut selalu merupakan alat pemasaran yang efektif dan bisa sangat berharga untuk menghubungkan situs Anda dengan dunia offline. Berbicara dengan teman dan orang di jaringan Anda adalah cara yang bagus untuk memulai. Tetapi Anda juga dapat menjadi sukarelawan di komunitas Anda, melakukan ceramah, menyelenggarakan atau mensponsori acara, dan memanfaatkan peluang lain untuk terhubung dengan audiens Anda secara langsung. Ke mana pun Anda pergi, beri tahu orang-orang tentang situs Anda!

Cara melacak situs web Anda
Penting untuk mendapatkan umpan balik tentang bagaimana pemirsa Anda berkembang, dan salah satu manfaat daring adalah semua metrik yang Anda butuhkan dapat dilacak. Berikut adalah beberapa cara sederhana untuk mengetahui kinerja situs Anda:

Google Analytics
Google menawarkan berbagai alat untuk mengukur data situs web Anda guna mendapatkan lebih banyak wawasan tentang pengunjung Anda. Solusi berkisar dari alat dasar gratis hingga analitik perusahaan yang canggih. Pelajari lebih lanjut di situs web Google Analytics.

Metrik media
sosial Sebagian besar platform media sosial menawarkan pengukuran data dasar. Untuk indikasi yang baik tentang kemajuan Anda, lacak jumlah pengikut dan pertumbuhan mereka dari waktu ke waktu, serta keterlibatan mereka pada posting Anda (keterlibatan 1-5% dianggap baik).

Langkah selanjutnya
Setelah Anda mulai membangun audiens online Anda, cari beberapa indikator ini untuk membantu Anda mengoptimalkan upaya Anda dan naik ke level berikutnya.

Konversi
Apakah Anda mendapatkan banyak lalu lintas situs tetapi tidak banyak penjualan atau pelanggan? Orang yang keluar dari situs Anda sebelum waktunya dapat menjadi indikasi bahwa situs web Anda perlu bekerja keras untuk mempertahankan pengunjung dan menginspirasi tindakan yang mereka inginkan (seperti pembelian), atau bahwa Anda menargetkan jenis pengunjung yang salah.

Pengujian
Cara terbaik untuk mendapatkan umpan balik yang berharga di situs web Anda adalah dengan melakukan beberapa pengujian kegunaan. Ini berarti membiarkan orang sungguhan mencoba situs Anda dan melihat reaksi mereka.

Distribusi
Jika Anda mendapatkan banyak lalu lintas di satu platform media sosial, tetapi itu tidak menyeberang ke situs web Anda, Anda mungkin ingin memikirkan untuk memperkuat hubungan antara situs web Anda dan akun media sosial Anda. Saat Anda membuat dan memposting konten di satu tempat, penting untuk menyebarkan berita di mana-mana dan melakukan lintas promosi di seluruh platform agar audiens Anda tidak terpecah belah. Selain itu, pastikan untuk menyertakan link ke halaman yang relevan di situs Anda di postingan media sosial Anda — dan menyertakan link ke akun media sosial Anda di situs Anda - sehingga pengunjung dapat dengan mudah menyukai dan mengikuti Anda di media sosial, langsung dari situs Anda.